Sunday, December 30, 2007

New Year's Lentil Stew...with a Twist


In many cultures, eating lentils on New Year’s Day is considered to be good luck. Italians believe that the lentils represent coins, and eating them will bring prosperity in the new year. Every January 1st, Hungarians and Brazilians eat lentil soup hoping it will bring riches, and even in the American South, families are served "Hoppin' John", a lentil, black-eyed pea, and greens stew, which is said to bring luck to those who eat it.

I don't know what is in the cards for me this year, but I plan to eat lots of lentils in 2008. I just love them! They are healthy, low in calories, loaded with protein, and most importantly, delicious. This recipe combines lucky lentils with chicken and cinnamon tea, which gives the stew something of a Moroccan flair. Serve it with a crisp, green salad for a perfectly healthy, perfectly lucky meal. Happy New Year!

Moroccan Lentil Stew with Cinnamon
Serves 6
4 cups hot water
4 tea bags, cinnamon flavor
½ lb dried brown lentils, rinsed and checked for stones
2 tablespoons olive oil
1 medium onion, chopped
2 cloves garlic, chopped
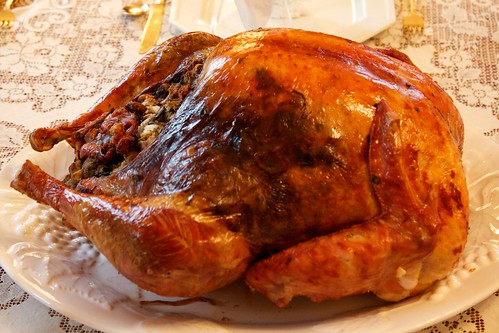
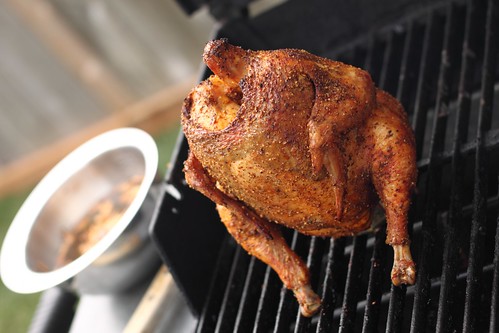
3 lbs chicken, cut into bite-sized pieces
1 – 14.5 oz can diced tomatoes in sauce
1 teaspoon salt
Freshly ground black pepper
½ cup dry roasted almonds, roughly chopped
3 T Italian flat leaf parsley, chopped

Combine four cups hot water and four cinnamon tea bags and allow to steep for approximately 5-7 minutes.
Add tea and lentils to a large stew pot. Bring to a boil, cover, and simmer for approximately 20 minutes, or until lentils are tender. Remove to a large bowl and set aside.
In the same pot, add olive oil and sauté onions and garlic until softened. Add cut-up chicken and cook until cooked through and no longer pink inside (about 10 minutes).
Add diced tomatoes and cooked lentils to the pan and heat through . Season with salt and pepper.
Add chopped almonds and parsley and serve.


Nutritional Information
Serving : 1/6 of recipe (387 g)
Calories 381
Total fat 15g
Saturated Fat 2g
Trans Fat 0g
Cholesterol 98mg
Sodium 561mg
Carbohydrates 18 g
Dietary Fiber 8 g
Sugars 1 g
Protein 45 g

Monday, December 17, 2007

Christmas with Nana


One of my most cherished Christmas memories dates back to Brooklyn, New York, circa 1978. One evening, while visiting my grandparents for the holidays, my mother decided to visit an old high school friend. For a reason I still can not fathom, I pitched a childish fit and refused to go. In an uncharacteristic move, my parents actually gave in to me, and allowed me to stay behind with my grandparents. Lucky for me, it was the evening my grandmother had chosen to make the Christmas Struffoli.

I vividly remember sitting next to her at the Formica kitchen table, watching her mix the dough for the Italian delights my entire family adored. First she used the dough to make "oilyettes", her special pretzel-shaped cookies, which would later be deep fried and then covered with clover honey and colored nonpareil sprinkles. I tried over and over again to replicate the pretzel shape that she fashioned so effortlessly. While hers were perfect little bows, mine were basically a mess. My grandmother had the patience of a saint, and never once complained that what should have taken a half an hour was taking double the amount of time. My oilyette-challenged fingers were chalked up to my young age, but now I'm in my 30s and still cannot approximate her deftness.

Once the oilyettes were formed, and laid in perfect rows atop waxed paper, we would use the remaining dough to make the struffoli. Since these simply required sections of dough to be rolled into small balls, my confidence was reinstated. My grandmother and I were able to work side-by-side, quickly rolling the dough and covering the table with marble-sized balls. When it was time to fry the dough, I carefully watched as the white, raw dough was transformed into golden cookies, right before my eyes. Once cooled, we honeyed and sprinkled the oilyettes and struffoli, and put them on the dining room sideboard until the next day...Christmas Eve.
Although my grandmother has been gone over eighteen years, my mother and I diligently make her struffoli each and every Christmas. We always try our hand at the oilyettes, but always end up defaulting to the struffoli. They are still a family favorite, and I look forward to continuing the tradition with my girls as they grow. Buon Natale!

Nana's Struffoli

Makes about 4 dozen

2 ½ cups flour
½ cup sugar
1 teaspoon baking powder
½ teaspoon salt
1 egg
½ cup milk
2 Tablespoon butter, melted
1 teaspoon vanilla extract
1 teaspoon lemon or orange extract (or lemon or orange oil)
Vegetable oil for frying
1 cup honey
1 Tablespoon multicolored nonpareil sprinkles


In a large bowl, combine flour, sugar, baking powder and salt.

In a small bowl, beat together the egg, milk, butter, vanilla and citrus extract.

Stir egg mixture into flour mixture and combine to make a soft, pliable dough.

In a large, deep skillet, heat 2 inches of oil.

Meanwhile, on a floured surface, roll dough into ropes and cut into small pieces (¼-½” pieces). Roll each piece into a marble-sized ball.

Fry in oil about a minute, until they rise to top and are golden.

Fry in batches so as not to overcrowd the pan. Allow oil to return to temperature between batches.

Drain on paper towels and allow to cool.

In a medium saucepan, heat honey to a boil.

Remove from heat and stir in the strufoli balls until completely coated.

Transfer to a platter.

When completely cooled, top with colored sprinkles.

STORAGE: Cover struffoli loosely with tin-foil and serve at room temperature for 2-3 days.
Above photo by BravaBravaMariarosa.

Monday, December 10, 2007

Restaurants: Osianna, Fairfield CT


Osianna opened its doors during the summer of 2007, in a space that seemed to have a somewhat unlucky track record. In the past several years it was a French restaurant (Voila), then an unmemorable seafood restaurant, and later a New England-themed eatery(Sherman's Reef). Finally, the owners of the wildly popular Quattro Pazzi and Cafe 4 Quattro restaurants claimed the space and turned it into Osianna, a "Mediterranean taverna". Named for one of the owner's daughters, Osianna has an airy, Greek-nautical themed interior, and serves a variety of "small dishes", salads, sandwiches, and entrees prepared in the Greek and Italian traditions. Their specialty is fresh seafood, but for landlubbers, there are plenty of other dishes to tempt your palate.
While most Americans have come to appreciate Italian cookery for more than baked ziti and pizza, most still consider Greek food to be what is typically found in a diner; Spanikopita, Gyros, and Souvlaki. If you travel to Greece, as I did on my honeymoon, you'd be surprised to discover that the cuisine extends far beyond what is commonly found in America.

At Osianna, you won't find Americanized versions of anything. The food is reminiscent of the deliciously simple dishes one finds in the Greek Islands and Southern Italy---- loaded with fresh flavors and excellent quality ingredients. On my several visits to Osianna, I've tried practically all of the "small dishes" which are like appetizers. Most times I like to select a few small dishes in place of an entree, in order to try a wider variety of flavors. However, don't let that steer you away from the entrees; they are definitely worth ordering.
According to a recent New York Times article, "small plates" (think tapas) are the new direction in food, while entrees are "near extinction." However, at Osianna, they manage to get them both right. There is a wide selection of small plates for the smaller appetite or people like me who like to eat a lot of different things, and a well balanced list of entrees for those wanting a more traditional meal. I have never once been disappointed with either option.


While the quiet dining room and white tablecloths may steer families away, I found the staff most accommodating when I dined with my two young children. Although they did not have high chairs or a children's menu, the kitchen was more than happy to make small dishes of pasta for my kids. If you are dining with little ones, it is best to go at lunchtime, or for an early dinner, (before 6pm) when it tends to be a bit less crowded. In addition, during the warmer months, the outside patio overlooking Reef Road is a perfect place to bring the family and watch the cars (and the occasional fire engine) pass by.

Osianna is a fantastic addition to the Fairfield dining scene, which is quickly becoming a dinnertime destination for people from all over the county. It has the know-how of a seasoned restaurant, an exciting menu, and an attentive waitstaff.. Three cheers to Osianna bringing fantastic, Mediterranean-inspired food to Fairfield in an attractive, upscale setting.

My favorite dishes:
Small Plates: Shrimp Saginaki with Tomato and Feta, Grilled Marinated Octopus with Rocket and Red Onion, and Baby Eggplant Stuffed with Caramelized Onions and Kasseri Cheese

Salads: Rocket and Romaine Salad with Grapes, Walnuts, Gorgonzola Cheese and Cranberries, and the Vine Ripened Tomato Salad with Olives and Feta

Entrees: Fresh Fettucini with Veal Ossobucco Sauce, and Branzino Fillet with Caramelized Onions and Roasted Tomatoes

Osianna
70 Reef Road (at the corner of Sherman Court)
Fairfield, CT 06824
(203) 254-2070

Prices
Lunch: Small Plates & Salads, $7-15, Sandwiches, $8-15, Entrees, $15-19
Dinner: Small Plates & Salads, $7-17, Entrees, $22-37

Hours
Open every day for lunch (11-3pm) and dinner (5-10/10:30pm)
No reservations.

Sunday, December 2, 2007

Books: Deceptively Delicious


Deceptively Delicious, a cookbook recently released by Jessica Seinfeld (yes, that Seinfeld), has stirred up quite a bit of controversy. I first learned about the book when Oprah featured it on her show in early October. As we all know, what Oprah touches turns to gold. Just think Dr. Phil, Dr. Oz, Rachael Ray, and every Oprah Book Club selection since its inception. The cookbook's concept is that by pureeing various vegetables (and some fruits), parents can "hide" them in a variety of foods (like brownies) in order to get their kids to eat nutritiously. It was no big surprise when Deceptively Delicious became the best selling book in the country before it even physically hit the bookstore shelves (thanks to "pre-ordering" and online retailers).


Enter controversy number one: another book, The Sneaky Chef, by Missy Chase Lapine, with the exact premise, had already been released six months prior. If Oprah thought it was such a fantastic idea, why didn't we ever see this book featured on the show? My guess is that it was not on too many radar screens until Deceptively Delicious was released. Did Jessica rip-off the entire concept and use her famous last name and connections to outsell and outshine Miss Missy?

And now, enter controversy number two: should we even be "hiding" vegetables from our children? Shouldn't we be teaching them to WANT veggies, instead of tricking them into eating them?


We're not talking global warming, the war in Iraq, or the 2008 presidential election here, but I'm quite certain most parents have thought about how to get veggies into kids at one point or another.


The book itself is well organized, attractive, and full of cute drawings and full-color photographs. The spiral binding is reminiscent of my mom's Betty Crocker cookbook from the 60's, and gives the book a bit of a "retro" feel. It is actually a useful feature, and allows the open book to lie flat on the counter, without the pages flipping while you're trying to follow the recipe.


But what about the concept of the book? Well, first of all, I admit that my very first thought was "Damn! Why didn't I think of that?!?" My next thought was that I wanted to try it out on my kids to see if they really wouldn't detect the veggies (they are expert veggie-detectors). So, after I got over my outrage that Jessica Seinfeld got a cookbook published simply because she's famous, and I successfully folded a cupful of butternut squash into my kids' mac and cheese (which actually made it taste MUCH better), I thought more about this whole concept, and whether I wanted to make it part of my routine.


I wholeheartedly agree with those who believe this "deception" is wrong, and we are not teaching our kids good nutritional habits. Kids need to eat veggies, knowing they are veggies, and learn to like them, even if it takes many, many attempts to do so. Child cannot survive on breaded mystery meat alone. HOWEVER, I also think Jessica (and Miss Missy) are really on to something. As long as my kids are eating fresh vegetables every day, in their original form (as opposed to pureed and hidden), I'm perfectly fine with adding a few extra nutrients here and there through the use of purees. I don't call it "sneaky"----I prefer to think of it as "nutritional enhancement".


However, I do take issue with the amounts of pureed veggies in each dish featured in Deceptively Delicious. Most include only a half cup or less in the list of ingredients. When you divide that by the number of servings in each recipe, it hardly seems worth the effort of steaming, processing, and storing all those purees. I'd rather just give my kid a carrot.


In conclusion, I'm not disappointed I spent $15.00 on this book. It has some good ideas, and I will definitely use some of the recipes (the brownies with spinach have me particularly curious). I'm not going to speculate on whether or not this concept was entirely Jessica's, or whether or not she personally developed the recipes. I will say, that for what it's worth, I doubt The Sneaky Chef would be #8 on the New York Times best seller list without all this controversy!


Below is my quicker version of one of Jessica's ideas (or was it Missy's?). All kids love boxed macaroni and cheese, but by using an organic version with whole wheat pasta and a mashed sweet potato, you can feel better about serving this convenience food. Dark yellow and orange veggies are loaded with beta carotene, and sweet potatoes are rich in complex carbohydrates, dietary fiber, vitamin C, and vitamin B6 (Wikipedia). You may even find yourself dipping in for a few spoonfuls as well!


Mac & Cheese with Sweet Potato Puree
Serves 4 kids


1 box organic mac & cheese (preferably one with whole wheat pasta)

1 t. salt

1/4 cup lowfat or skim milk

1 medium sweet potato, scrubbed and pierced all over with a fork


Place the sweet potato on a plate in the microwave for approximately 5-7 minutes, or until softened. Remove from microwave and allow to cool enough so it can be handled.


Slice potato in half lengthwise and scoop out flesh. Mash with a fork and set aside.


Meanwhile, bring 6 cups of water and 1 teaspoon of salt to a boil in a medium saucepan.


Add pasta, and cook until al dente (approximately 7-10 minutes).


Drain, return to pot and add cheese packet, 1/4 cup of milk, and sweet potato. Stir to combine.


Serve immediately.


Tuesday, November 27, 2007

Farro: My New Favorite Grain


While browsing around The Pantry, one of my favorite local gourmet markets, I came across a package of farro. I had eaten farro a number of times, but had never cooked it myself. Farro, also known as "emmer wheat" is a hulled wheat common in Italy. What I discovered, was that it was similar to barley in texture, but nuttier and more delicious.


The day after I purchased the farro, I received an email newsletter from one of my favorite bloggers, Heidi over at 101 Cookbooks. It was as if the food planets alligned and I had a culinary "moment". Heidi's email was about none other than farro! Coincidence? Perhaps....but how do you account for the fact that all the ingredients listed in her recipe were also items I'd randomly purchased the day prior? Butternut Squash, walnuts, and goat cheese all found their way into my grocery cart before ever having seen her recipe. Paired with the red onions and fresh herbs I always keep on hand, I could make her "Farro and Roasted Butternut Squash" without having to return to the store (now THAT is a first!). You call it coincidence, I call it foodie-divine intervention!


My attempt to make "risotto" out of barley delicious, and I even included it in a "Holiday Side Dishes" class I am teaching this season. So, I figured making a similar dish with farro might yield an even bigger reaction. I was right. My Farro Risotto with Mushrooms was even better than the version with barley. Better yet, it cooks even more quickly. Give it a try!


Farro Risotto with Mushrooms


Serves 4 as a side dish


5-6 cups hot low-salt chicken broth,

1 medium onion, chopped

1 cup farro

3/4 lb Baby Bella mushrooms, sliced (or your favorite mushroom variety)
1 t dried thyme
olive oil
salt and pepper

1/4 cup fresh flat leaf parsley, chopped
Parmesan cheese (optional, but totally recommended!)


In a medium sauce pan, heat chicken broth and cover to keep hot.


In a large chef's pan, saute onion in olive oil until softened. Add farro and stir to coat with oil. "Toast" the farro for a minute or two.


Add 1 cup broth, and stir. When broth is nearly absorbed, add 1/2 - 3/4 cup more broth, stir, and allow to absorb. Repeat this procedure until farro is tender to the bite (this should take about 20 minutes).

Meanwhile, in a medium fry pan, saute mushrooms in olive oil. Add thyme, salt and pepper. Cook until softened.


When farro is tender, add mushrooms and parsley. Stir to combine.


Serve with grated Parmesan cheese.

Saturday, November 17, 2007

Turkey Leftover Solutions

Turkey
 If you are like me, I make an extra big turkey on Thanksgiving because I enjoy the leftovers more than the actual meal. The next day, instead of fighting the crowds at the mall trying to get a head start on Christmas shopping, I prefer to relax at home ... with my leftovers. I admit having a weakness for cold stuffing and turkey sandwiches slathered with mayo, but I also enjoy coming up with new ways to use the remains of of the day prior.

One of my favorites is a Turkey-Cranberry Salad Wrap. Think chicken salad, with a Thanksgiving twist. I combine diced white meat turkey, veggies, dried cranberries, and gorgonzola cheese with a touch of mayo to make a perfect filling for a whole wheat wrap. The crunch of the veggies and the tang of the gorgonzola give this a leg up on regular-ol' chicken salad! In addition, the cranberries give it a great red "pop" of color.

To warm up on a chilly November day, try my Quick Turkey Noodle Soup. Since I tend to have a lot of dark meat leftover, I shred it up and add it to some broth, along with fresh veggies and noodles. If you have leftover carrots and green beans, you can even toss those in for an even quicker cooking soup!

Relish in your leftovers!


Turkey-Cranberry Salad Wrap
Makes 4 wrap sandwiches


2 cups diced cooked turkey (preferably white meat)

1/4 cup diced celery

1/4 cup dried cranberries
1/4 cup crumbled gorgonzola cheese

1/3 cup light mayo

salt and pepper to taste

4 romaine lettuce leaves (or substitute 3 oz baby spinach)

4 whole wheat wraps


Combine turkey, celery, cranberries, gorgonzola and mayo in a medium bowl. Stir until incorporated. Season with salt and pepper to taste.


Lay out 4 whole wheat wraps on your work surface. Line each with one leaf of romaine lettuce (or divide baby spinach equally among wraps).


Place 1/2 -3/4 cup of salad in center of each wrap, and fold/roll as desired.


Serve chilled or at room temperature.


Quick Turkey-Noodle Soup

Serves 4

6 cups low-salt, canned chicken broth
2 carrots, diced (or 1 cup leftover cooked carrots, diced)

1/2 lb green beans, ends trimmed and cut into 1" lengths (or 1 1/2 cups cooked green beans, roughly chopped)

1/2 cup fine egg noodles

2 cups shredded turkey meat (white or dark, or a combination of both)

1/4 cup fresh parsley, chopped

salt and pepper

In a medium-large saucepan, combine broth, fresh carrots, fresh green beans, and pasta. Bring to a boil, cover, and reduce to a simmer. Cook approximately 5-7 minutes, or until veggies are tender and noodles are cooked.


Add shredded turkey, fresh parsley, and salt and pepper to taste. Heat through and serve hot.


NOTE: If using leftover veggies, cook noodles in broth first, then add cooked veggies, shredded turkey, and parsley after noodles are tender.


Monday, November 12, 2007

Books: Skinny Bitch


Normally, I would never buy a book called Skinny Bitch ( by Rory Freedman & Kim Barnouin, Running Press, 2005). The title alone gets me riled up for a variety of reasons, which I won't go into right now. However, when my friend JH recommended this book, I decided to give it a read. JH is wholly committed to healthy living, organic food, and holistic healing. She described it as a book to help get you on track to healthy eating---so that seemed worth checking out, even if I do hate the title.


Skinny Bitch is basically, a guide to healthy eating, but written in an "in-your-face" style. The two authors, Ms. Freedman and Ms. Barnouin, don't mince words when they say things like "you cannot keep shoveling the same crap into your mouth and expect to lose weight" and "...foods like meat, eggs, cheese, milk, and processed, refined foods....can clog up your ass." Okay, thanks for that visual. I will say that they make a sometimes rather dry subject pretty interesting, even if they have to pepper the book with profanity and vulgarity to make the reader pay attention.


What I DO like about this book is that the authors have clearly done their research. As vegans (that's a vegetarian who also does not eat ANY animal products like dairy, eggs, etc), they defend their lifestyle choice with solid scientific evidence that makes you wonder why you're eating so much junk. They talk about why meat and dairy are really not meant to be part of our diet, and why complex carbohydrates ARE . They tout the importance of buying organic and the dangers of artificial sweeteners. They discuss what caffeine does to your body, and why cold medicines interfere with Mother Nature's plan. And then, they give you four weeks worth of daily menus to help you get started on cleansing your body.

What I DO NOT like about this book, is that most of it is couched in terms of "this is what you need to do to get skinny", or, as they put it, to become a "skinny bitch". From a pure marketing standpoint, I know as well as anyone that books about getting thin sell, books about getting healthy don't. Let's face it, most people who watch what they eat and hit the gym every day do it to look good---not necessarily because it is healthy (that's just a nice bonus). However, true as it may be, I still find it insulting. Basically, the only reason I'd completely change my lifestyle---give up meat, dairy, Splenda, coffee, soda, etc.---is to be a "skinny bitch"? I'd better feel pretty darned terrific and live to be 100 to give up all that!


All kidding aside, I found the book a tiny bit depressing. Mostly because I believe what they say is right. I agree that giving up meat (or at least cutting back significantly) is healthy. I agree that dairy isn't really something we're meant to ingest. I know that the Splenda I put in my coffee every morning---and even the coffee---really aren't that great for me. I know I probably would feel a lot better if I started eating according to their plan. But I also know that for me, especially as a cooking instructor catering to a wide variety of clients, it is a tall order. Yes, I can eat less meat, but not none. Yes, I did order a soy latte at Starbuck's the other day (and skipped the Splenda), but I probably won't do it every time. And yes, I did go and buy a tub of organic Earth Balance spread to slather on my sprouted whole wheat toast (both of which are actually tasty!). But I'll tell you right now, I draw the line at cheese!

Skinny Bitch is definitely worth reading, if you can get past the constant "skinny" references and the somewhat arrogant tone of the book. Overall, I found it pretty informative, and it makes me think twice before shoving a handful of Oreos down my throat. Besides, who wouldn't love a book that has an entire chapter devoted to pooping?


The "bitches" are coming out with a new book in December (surprise, surprise, right in time for the holidays!), called Skinny Bitch in the Kitch, a cookbook for those of you who "want to stop cooking crap and start looking hot!". Hmmmm. For now, just try this vegan recipe and see if you feel any bitchier.


Vegan Stir Fry with Tempeh

Serves 2


1 - 8 oz package tempeh, cubed

1 red bell pepper, cut into a large dice

8 oz sugar snap peas

3 medium carrots, sliced

2-3 T canola oil

3 T soy sauce

3 T sherry
1/2 t sugar

In a measuring cup, combine soy sauce, sherry and sugar. Stir to combine and set aside.
In a large chef's pan, heat oil over medium-high heat. Add the ingredients in the following order, cooking for approximately 1-2 minutes in between each addition:

carrots, red peppers, tempeh, snap peas


Add the soy sauce mixture, raise the heat slightly, and cook another minute.


Serve alone or with rice.

Sunday, November 4, 2007

BBQ Class for the Teacher

Mmmm... ribsIn 1995, I decided to combine my passion for food and cooking with my love of teaching, and began teaching cooking classes. I started by teaching through the local Continuting Educaton Program. After less than a year, I built up a bit of a following and decided to go into business for myself. However, despite my busy schedule running a small business and teaching classes at my house each week, I still make time to teach for the Continuing Education Program that took a chance on a passionate home cook and gave me my start in this field.

Last month, as I was checking my listings in the catalog of classes sent out by Continuing Ed., I noticed a new class being offered through the program. "BBQ Passion: The Basics of Barbeque Cooking" was a new, one-time class and would be taught by the owner of a popular local barbeque restaurant. Bobby Q's of Westport, Connecticut, was featured on the FoodNetwork at one point last year, and has become somewhat of a hotspot for good barbeque in Fairfield County. My husband and I have been talking about installing an outdoor kitchen-barbeque at our home, and I figured it couldn't hurt to go learn from the experts before taking the plunge.


Being on "the other side of the counter" was definitely a fun experience. Bob LaRose, owner of Bobby Q's brought the class to the restaurant's rooftop deck, where a demonstration table was set up. Each participant received a multi-paged "book" with everything one would ever want to know about authentic barbeque, which, we learned, is entirely different from the backyard grilling we normally refer to as "barbeque". Grilling is cooking food on grates and over high heat for a relatively short period of time. Barbeque, on the other hand, is typically done with indirect heat or smoke, and requires several hours of cooking time. The Boston Butt pork Bobby Q's uses to make their most popular menu item, pulled pork, is cooked for almost 20 hours!

We started with dry rubs. We sampled basic rubs, fancy rubs, sweet rubs, and spicy rubs. Dry rubs are the cornerstone of barbeque at the restaurant, and the chef demonstrated how he applies rubs to racks of ribs, briskets, and Boston Butt (which, is not the "butt" at all, but rather a cut of meat from the pig's shoulder). We discussed which cuts of meat marry better with which rubs (the chef prefers brown sugar rubs with pork and granulated, white sugar rubs with beef and chicken).

We then talked about sauces, which at Bobby Q's, are used primarily for dipping tableside. Again, we sampled a wide variety of sauces to determine which flavors were our favorites. We covered home smokers, types of wood for smoking, and how to tell when something is ready to eat. Then, finally, came the eating!


First we tasted the St. Louis Ribs, which are smoked with a simple rub. According to Bobby, "authentic" barbeque is supposed to have a little "pull" to the meat (meaning you need to work a bit to get it off the bone), the ones we tried were as tender as could be, and literally fell off the bone into your mouth. He noted that in the northeast, people tend to like the more tender meat, so he gives the people what they want. He also stated that while in other parts of the country, people prefer the St. Louis style ribs, here in Connecticut, the Baby Backs are by far the better sellers. Different demographic, different tastes.


It was time to move indoors into the kitchen, where we gathered around the smoker large enough to shelter a small family (a mere $25,000, if you're in the market for one). When the door opened, we saw a gigantic Boston Butt coming around on the rotisserie, which operated much like a ferris wheel (the meat sitting on one of the "seats", which is really a large, moving rack). Luckily for us, it was just ready to come out of the smoker, so the chef pulled it out, deboned it (the bone literally slid right out), and began to shred the meat. To say it was tender would be an understatement. Then the brisket came out. I felt this particular cut had been a bit dry and overcooked (and the chef concurred), but it was still decent. It perhaps just needed some of that tableside dipping sauce to moisten it up.


All in all, the class was informative and fun. It didn't surprise me that the participants were mostly men, whereas my classes consist almost exclusively of women. I suppose people consider barbeque more "manly" than other types of cooking. Manly or not, it is certainly one-sloooow-process, for which I'm not sure I have the patience. The results are great, but waiting 8 hours for some ribs to cook is not my kind of weekend activity. I think I'll leave the smoking to Bobby Q's.

Sunday, October 28, 2007

The Great Pumpkin

Pumpkins
Lately, it seems as if the blog-gods have been willing me to write about pumpkins...and since it is almost Halloween, why not? Everywhere I turn I see pumpkin-flavored foods----my neighborhood ice cream parlor has pumpkin ice cream on special, Starbuck's reportedly has pumpkin scones (although I've only heard about them!), my mother sent me a recipe for pumpkin soup, and then, last Sunday, one of my favorite local breakfast spots, The Blue Bird Inn in Easton, Connecticut, featured Pumpkin Walnut Pancakes with Maple Butter. I went to brunch with the intention of having eggs and whole wheat toast, but when I saw the featured pancakes, all thoughts of protein and whole grains went out the window.

The generously-sized pancakes were sweeter and moister than traditional buttermilk pancakes, and slightly more dense. The walnuts gave a nice crunch, but did not overpower the texture. While they would have been good with regular butter, the maple butter was a great compliment to the pancakes. I chose to have mine with sausage instead of bacon on the side, because there is something about the combination of pumpkin and sausage that I love.

As soon as I got home, although stuffed to the gills, I started experimenting while the tasting memory was still fresh in my mind. I decided to use canned pumpkin and a multi-grain pancake mix to simplify the process. By adding a variety of spices and whipping up some maple butter, the result was just as good as the Blue Bird's. Now if I could only borrow their dishwasher!

Enjoy this dish on Halloween or Thanksgiving morning, or any other crisp, fall weekend that beckons for a visit from the Great Pumpkin!

Short-cut Pumpkin Pancakes with Walnuts and Whipped Maple Butter
Serves 4.
2 cups multi-grain pancake mix
1 cup milk
1/2 cup canned pumpkin puree
2 Tablespoons canola oil
1 t cinnamon
1/4 t freshly ground nutmeg
1/2 cup walnut halves
Non-stick cooking spray

Whisk all ingredients except walnuts in a large bowl until smooth. Gently fold in walnuts.

Spray a griddle or large frying pan with non-stick cooking spray, and scoop approximately 1/4 cup of batter onto hot pan.

Cook until some tiny bubbles begin to appear on top of the pancake, and flip (because of the density of the pancakes, you'll see fewer "bubbles" than with regular pancakes, so check the underside before flipping). Cook an additional minute or two, or until golden brown.

Serve hot with whipped maple butter (recipe follows) and syrup.


Whipped Maple Butter

1 stick unsalted butter, at room temperature
2 T maple syrup

Using an electric mixer, combine butter and maple syrup and beat until fluffy.
Serve with pumpkin-walnut pancakes.


Note: You can make this ahead of time by form maple butter into a log and wrap tightly in plastic wrap. Refrigerate until needed.


Monday, October 22, 2007

Salt Pig Love

Simply put, I love my salt pig. I bought it many years ago from a cooking catalog, which probably no longer exists. At the time, I wasn't even sure I would like it, and I'd never seen one in person, but the concept seemed like a good one. Up until that point, I kept my salt in a small ramekin on my counter top. It was perfectly serviceable, however, I often wondered if I was seasoning my food with a mixture of salt and dust. When I saw this "hooded" dish, it struck my fancy and I ordered it. It turned out to be one of my favorite accessories.


When teaching cooking classes in my home kitchen, my bright red salt pig draws quite a bit of attention. Many students have never seen one, and its name always elicits a laugh. In a nutshell, the salt pig is basically a ceramic salt cellar that is kept on the counter top. It's open-mouthed (or open-"snout") design gives cooks easy access to salt, the king of seasonings. You may be wondering why I just don't keep a salt shaker handy. The answer is simple: when "shaking" salt into a dish, it is very easy to misjudge the amount you are adding. Instead, if you scoop some salt into your hand and add it with your fingers, or better yet, use a measuring spoon, you'll have a much better sense of how much you're using. The salt pig is just a great way to store your salt (I prefer Kosher Coarse Salt or Coarse Sea Salt), and looks great on the counter next to your stove.

Salt pigs come in all sizes, but I prefer mine on the smaller side. It simply takes up less space on my counter, and I don't know of too many occasions where I'll need easy access to a pound of salt! Most come with a small ceramic or wooden spoon with which to scoop the salt, but other, wider mouth varieties are usually designed for a cook's fingers and come without a spoon. They all have the opening on the side, rather than the top, to prevent things from dropping into the salt, and many have a small knob on top to be used for moving it around the kitchen.


Salt pigs vary considerably in price too; designer salt pigs can run as high as $60, but most are under $30. Because I get so many questions about my salt pig during classes, I just started carrying stoneware salt pigs in my new web store. They hold 6 ounces of your favorite salt, and come in oatmeal or navy blue ( pictured above). They even have a cute pair of little piggie ears and a curly tail to boot!


While I am not much of a "gadget girl" in the kitchen, I don't know what I'd do without my beloved salt pig! Bring a pig into your kitchen too...you'll be happy you did.


Monday, October 15, 2007

Restaurants: Bloodroot, Bridgeport, CT


Bloodroot, on the water in Bridgeport, Connecticut, describes itself as a "feminist, vegetarian restaurant". That alone was enough to make me curious. I consider myself a feminist, and I definitely like vegetarian food, so when a friend suggested we plan a visit, I was game (naturally, as two full-time moms and part-time professionals, it took us literally six months to find a date, but we finally went!).


In the dark, finding Bloodroot is a bit of a challenge if you've never been there. Luckily, my friend was a returning visitor, so she directed me to the dimly lit restaurant which looks somewhat like a house. The entrance is on the side, through a lovely patio overlooking the harbor, where diners may eat during the warmer months. True to their philosophy of not being wasteful, all the exterior lights are on motion detectors and go on only when a person enters the patio. In a world of overlit public and retail spaces, it at first seems a bit disconcerting, but upon further contemplation, seems perfectly rational.


Upon entry to Bloodroot, one finds a warm, bohemian-vibed dining room with an open kitchen, and a small, feminist bookstore in the back, that almost beckons you to sit down and read something. The walls are simply adorned with dozens of old, sepia toned and black and white photographs of women. Regular women-- mothers, daughters, and sisters who were important in the lives of others. The menu is written on a chalkboard overhead, and features several seasonally appropriate vegetarian and vegan soups, salads and entrees. Nothing was priced above $17.

The protocal at Bloodroot is simple: make your selection from the chalkboard, place your order at the front desk, pay for your meal, and drop your meal ticket at the kitchen window. When your order is ready, your name will be called and the meal will be waiting for you on a tray at the counter. Don't forget to grab utensils and a napkin! If you want water or tea, you may serve yourself as well. The entire process is very egalitarian; you serve yourself and bus your own table. I like someone waiting on me as much as the next gal, but at Bloodroot it just feels right to do it yourself. We're all capable of doing it, so why not? Sort of evens out the playing field. Very feminist.


During this visit I had a simple, delicious dish of lentils and rice, with a side of green beans and tomatoes, and an olive tapanade, of sorts. For dessert (yes, there is dessert too!), I had a dairy-free chocolate cake, and my friend had an Asian Pear tart. The cake is actually more like a chocolate quick-bread, but is very dense. While just about everything on the menu is seasonal, the chocolate cake is mainstay because it is so popular.


Bloodroot is definitely not for the meat-and-potatoes crowd, but I'm certain just about anyone else would find something delicious to eat. One need not be vegetarian or vegan to enjoy this unique restaurant, but being open-minded and having an appreciation for simple, healthy, tasty food would be helpful. Bloodroot also is not for the pretentious, so don't come expecting anything fancy. What you can expect is a dedicated staff, a pleasant, minimalist dining room, and some good eats. So get off your high horse, go veggie for a night, and head on over to Bridgeport. Bloodroot makes it worth stepping out of the box.
Bloodroot, 85 Ferris Street, in the Black Rock section of Bridgeport, CT
203.576.9168

Sunday, October 7, 2007

Who Gives a Fig? ME!

Figs
Figs. What’s not to love about figs? They may not look so special on the outside, but slice them in half and you’re in for a treat. The ruby-red center is soft, sweeter than sugar, and nothing short of pure bliss. Indigenous to Asia and the Mediterranean, figs have been grown in the United States since the mid-1700s when Spanish missionaries brought them to California. Today, figs are grown all over the United States, particularly in warmer climates. They are harvested in late summer to early fall (usually through about mid-October), but only keep for about a week in your refrigerator, so when you see them in your local stores, buy them, and eat them fast!

Figs, commonly known as a fruit, are actually the flowers of a fig tree that inverted into themselves. There are many varieties of figs, including Common fig, Black Mission, Italian white, Italian black, and Kadota (the kind used in Fig Newtons). Figs not only taste delicious, but are extremely healthy. They are high in antioxidants, calcium, and fiber. In fact, figs have the highest fiber content of any fresh or dried fruit! So, eat up without a hint of guilt!

As a child, my grandfather kept a fig tree in his small, Brooklyn backyard, which was surrounded by full hydrangea bushes, heavy with pink and blue blooms. I remember my grandmother placing platefuls of halved figs on the dining room table, and my relatives devouring them, because they knew once they were gone, another year would have to pass before they could indulge once again. Once the season was over, he would prune, wrap, and cover the trees, to safeguard against the winter weather. To this day, I regret not appreciating how special it was to eat delicious, freshly picked figs grown by my grandfather. Now, as an adult, I’m certain to buy fresh figs the moment they hit the store shelves, and remember my grandparents as I savour each succulent, juicy bite. They are excellent on their own, but my favorite way to eat them is wrapped in prosciutto, a classic Italian preparation. By adding a drizzle of truffle oil, you turn a simple, ancient food into something spectacular.

Fig season is almost over----so hurry! You will be happy you did!

Fresh Figs with Prosciutto
Serves 4

8 fresh black mission figs (or other variety of fresh fig)
8 slices of Prosciutto di Parma, halved lengthwise
16 small pieces Parmesan cheese
Truffle oil, for drizzling (available at grocery and specialty stores)
Coarse Kosher Salt

Gently wash figs under cold running water. Pat dry and halve each one.
Place a small piece of cheese on top of each half, and wrap in a strip of prosciutto.
Place wrapped figs on a platter, seam side down, sprinkle with kosher salt and drizzle with truffle oil.
Serve at room temperature.
Note: This recipe can also be made with dried figs in the off-season.

Tuesday, October 2, 2007

"Cookbooks for a Cause" a Big Success!

Mary Cannon (l) and Angela Salvo (r), both of Fairfield, browsing through cookbooks.


On Saturday, September 22, 2007, I held The First Annual "Cookbooks for a Cause"---a cookbook sale for charity. As a cooking instructor and owner of The Secret Ingredient Cooking School, it was important to me to give back to the community which has been so supportive of my business. Thanks to MANY people and their generosity, I received OVER 400 books for the sale. Friends brought them to play dates and parties where they knew I'd be, strangers left boxes full of books on my steps, sometimes with a note, sometimes anonymously. People from all corners of Fairfield, Connecticut and beyond were happy to donate wonderful cookbooks, many in brand-new condition, to support a very worthy cause. The charity I chose to be the recipient of this year's sale is Quota International of Fairfield County. Quota's local G.R.A.C.E Project helps local kids with special needs in the schools, particularly those on the autism spectrum.


The day of the sale was exciting, and the weather looked like it would cooperate. Since I held the sale in my driveway, "tag-sale-style", I had sent many prayers asking for clear skies. My husband and I set up the hundreds of books up on borrowed tables. Categories included "notable authors", "general cooking", "ethnic cooking", "healthy & vegetarian cooking", "baking", "kids", and "Brand New Books!"--- the latter of which were generously donated by Bigelow Tea. The first customer of the day purchased a collectible Better Homes and Garden's binder cookbook for $2.00, and we ended on a high note when the last customer of the day walked away with a large stack of new and like-new cookbooks for $79.00.

Victoria Eastus (l) of Fairfield purchasing cookbooks at the sale from me (r).


As I closed up my cash box, I felt a drop of rain. I quickly moved the remaining books into my garage right before the skies opened up, and went inside to count the proceeds. The sale made close to $600 in three hours. For the first year of an event, I was very pleased. Since I still had a number of terrific books left over, I decided to make them available for sale on my website and at my cooking classes, and add to the amount of money going to Quota as they are purchased.

Thanks to everyone who donated so many cookbooks, tables, tents, and assistance with the sale. Thanks also to the local media outlets which helped promote the sale (SuzySaid.com and The Fairfield Citizen-News). In its first year, the sale was a success, and I hope for it to be even bigger and better in the years to come.

Monday, September 24, 2007

Beer Can Chicken: Not Just for Frat Boys

what PBR is good for
Beer in a can reminds me of college. I think of the frat boys chugging it, then smashing the cans on their foreheads, or making huge pyramids of the empties. "Shotgunning" is another frat boy activity that comes to mind when I think of beer cans. For those of you not "in the know" about such hi jinks, this involves making a hole in the side of an unopened can (usually done oh-so-safely with a ballpoint pen), then putting one's mouth over the hole while popping open the top of the can, creating a rapid flow of beer into said mouth. So, you're probably getting the picture----I don't exactly have a high-class opinion of beer in a can (or frat boys, for that matter---excluding my dear husband, who, of course, couldn't possibly have participated in such shenanigans!). Beer Can Chicken, however, is an entirely different story. Whether or not you like beer, you will love this recipe. Even your kids will love it, and I promise they won't be smashing cans on their heads after dinner is over.

The best part about Beer Can Chicken is that it is almost impossible to ruin. If you have an outdoor grill and a can of beer, you're halfway to success. Instead of using cut-up chicken parts, Beer Can Chicken uses a whole chicken. By cooking it whole, it retains more moisture and is more flavorful. In addition, by cooking the bird in a bit of an unconventional way, you are just about guaranteed a juicy result.

First preheat your grill to high heat (or about 450 degrees) while you prepare the chicken for cooking. To prepare the bird, rinse it under cold running water, then pat it dry with paper towels, inside and out. Season the cavity with salt and pepper, or your favorite poultry seasoning. Then rub some oil all over the outside of the bird, and season it as well. The last step of preparation is easy; pop open a can of beer and have a few slugs. Because we always tend to have bottled beer in our house, I have been known to fill an empty diet Coke can about three quarters of the way with beer, which works equally as well. The key is to have the can only partially full, to avoid overflow onto your grill grates.

Now comes the fun part. Take your chicken by the wings, and stand it up on it's hind legs. Place the beer can, right side up, into the bottom cavity (yes, it looks as unfortunate as you may imagine), and prop it right on top of the grill grates. You may have to reposition the legs in order to keep it from falling over, since the goal is to have it standing straight up. Now, close the grill cover and leave it to cook for about an hour. Because no part of the meat is touching the hot grill grates, it is not necessary to open the cover to check, flip, or prod your bird. The combination of the indirect heat source and the moisture of the beer steaming through the meat will allow it to cook slowly and evenly, and it can be left alone.

After about an hour, use a meat thermometer to test the temperature in both the breast and inner thigh. The internal temperature should reach 160-165 degrees in the breast, and about 180 in the thigh. Or, you may simply use your observational skills. When you make a small incision into the meat, is it no longer pink? Are the juices running clear? If yes, your bird is likely cooked. A smaller bird may be ready after only an hour, while a slightly larger bird may need an additional fifteen or twenty minutes. Once the meat is thoroughly cooked, allow it to rest for approximately 15 minutes before carving. This period of rest lets the juices redistribute in the chicken, instead of running all over your cutting board and rendering the meat dry. Once carved, you'll find a juicy, succulent, delicious chicken, that is perfect for a small gathering or family dinner. And no, it will not taste like beer! The beer does impart some flavor, but it is subtle and likely unidentifiable. All you'll taste is good, moist chicken!

So, pop open a can of beer, and make the most of the end of grilling season! No frat boys required!


Beer Can Chicken

1 4-5 lb. whole chicken, giblets removed

1 can beer

2 T Olive oil

Salt & pepper

Preheat your gas grill to high.
Wash and pat dry the chicken, and rub the outside with olive oil.

Season the bird, inside and out, with salt and pepper.

Spill out (or drink) about 1/3 of the beer, and place the can inside the bottom cavity of the chicken.

Place the chicken/beer can, standing up, in the center of the grill grate.

Turn the center burner off, leaving the front and rear burners on medium-high heat.

Close grill cover and cook for approximately 1 hour.

Using a meat thermometer, check internal temperature of breast and inner thigh. It should read 160-165 degrees in the breast and 180 in the thigh.

Continue cooking until chicken reaches above temperatures.
Remove to a platter and allow bird to rest for 15 minutes.
Carve and serve.

Serves 4.

Monday, September 17, 2007

Cookbooks for a Cause on September 22, 2007


Since I began teaching cooking classes about two years ago, I am frequently asked to contribute to a wide variety of local charitable causes. They aren't asking for money, per se, but rather a service to be auctioned off at a charity event (a cooking class, party, or specially prepared meal for the highest bidder). Early on, I enthusiastically agreed, eager to help a worthy cause while getting a little exposure for my new business.

Well, I quickly learned that once the word is out that you are a willing participant, the calls for donations start pouring in. At first I was flattered to be asked, then I became panicked that I was giving away the farm before I'd even built the barn, then I simply became overwhelmed. It was time to take control of my charitable giving!

One afternoon, while attending a lecture by a well-known restaurateur, a thought suddenly occurred to me; why not start my own charity event? By doing so, I could choose the type of event, how and when I held the event, and which charity or charities would benefit from the event. Naturally, it would have to be related to cooking. My mind was racing through dozens of ideas when the lecturer said something that clicked. She was talking about how she had some of her old cookbooks on a shelf in her restaurant for people to browse through---and bang! I had my idea. A cookbook sale! Donated cookbooks, sold to the public, money to a charity. That was easy! Now I had to get to work planning.

I put out the word that I was collecting cookbooks on my website, in my Secret Ingredient e-newsletter, and on a popular local website. I even had a "girls' night out" cocktail party for my friends and asked them all the bring any cookbooks they no longer used. Soon I was getting emails and phone calls from all over town asking to donate cookbooks. Within a week I had over 100 books. Some people donated one book, some gave five, and others gave me huge boxes full. Some of the books were older, some looked "gently used" and others were practically new. With less than a week until the sale, I have well over 300 books, and they continue to pour in.

The variety of books was also astounding. There were books on vegetarian and healthy cooking, baking, and cooking for kids. There were ethnic books ranging from Chinese cookery to Middle-Eastern appetizers and Italian desserts. There were also quite a few on microwave cooking, which surprised me, for a reason I can't explain. I received a large number of big, hard-covered, beautiful cookbooks, worthy of being called "coffee table" books, but also found myself sorting through an equally large number of pamphlet-type cookbooks, either put out by a food company (like Hershey's), or by a small kitchen-appliance company (like Cuisinart).

This year I chose QUOTA International of Fairfield County to be the recipient of the First Annual Secret Ingredient Cookbook Benefit Sale. I wanted to start with a local charity, and one that could really use the money. I hope the sale is a huge success and I am able to present QUOTA with a very nice check. I also need to be realistic in the first year of doing anything, but I'm optimistic and hopeful that the sale will meet or exceed my expectations.

This year's sale is Saturday, September 22, 2007 (go to http://www.thesecretingredientonline.com/ for more details), and although it has been a lot more work than I anticipated, I am very excited to kick off what I hope will be an annual event for many years to come.

Tuesday, September 11, 2007

Eating Well at The Ranch

I recently travelled to Lenox, Massachusetts to the Canyon Ranch resort, which is a spa dedicated to health and one's overall well-being. Each day there is a diverse schedule of activities and classes, which include various types of yoga, Pilates, strength training, aerobics, dance, and even West African Drumming. In addition, guests at the Ranch can participate in many outdoor activities, such as guided bike rides of all levels, hikes, and canoe or kayak trips. In between all this activity, you'll find all sorts of lectures on well-being, cooking demonstrations, and of course, dozens of spa services designed to pamper. You certainly won't be bored during your stay, but you WILL work up quite an appetite each day. Luckily, the Canyon Ranch dining room is top notch (and one of my favorite parts of visiting!).

Canyon Ranch is a place promoting good health and good habits, so naturally, the dining room is committed to healthy eating. To say it is a "health food restaurant" would be doing it a disservice, because it is much more than that. Yes, the food is very healthy (they even give the calorie count, the fat content, and the fiber content for each and every item on the menu), but more importantly, everything tastes wonderful. The range of ingredients used in the kitchen is mind-boggling. Many ingredients are not ones most people are familiar with, so each trip to the dining room is a new adventure. Jicama (pronounced HICK-a-ma), quinoa (KEEN-wa), and tempeh (TEMP-ee) are commonplace on the menu, but you'll also find lots of familiar food prepared in new, healthier ways too (roasted chicken, mashed potatoes, chili, and even baked ziti!).

The chefs at Canyon Ranch also put many interesting twists on traditional recipes. For instance, instead of stuffing a chicken breast with bread stuffing, they stuff a small quail with blueberries (delicious!). Instead of pairing baby lamb chops with traditional garlic and rosemary, they are encrusted with a "Zahtar" rub, which includes sesame seeds, sumac powder, thyme, and oregano, to name a few. They even find a way to make breakfast burritos interesting, by filling them with chicken sausage, steamed broccoli and low-fat cheddar cheese. Eating at the Ranch definitely can be a bit adventurous, but if you're willing to try a few new things, you'll find some new combinations and flavors you may have never otherwise tried, but will certainly love.

Despite their strong commitment to healthy living, Canyon Ranch still understands the power of a sweet treat at the end of a meal. In addition to a daily fruit plate, you'll also find chewy homemade cookies and homemade fruit sorbets and ice cream on the dessert menu. The ice cream (served with fat-free hot chocolate sauce) is rich and creamy, and is created in unusual flavors, including my favorite, Basil-Mint (out of this world!). There are also daily specials, which included delicacies like Raspberry Risotto Pudding, Boston Cream Pie, Chocolate Mousse, and Strawberry Shortcake during my visit. While many desserts are lower in fats and sugars than what we're used to, the chefs make no bones about the fact that the desserts aren't exactly health-food. The key is portion size. For those of you who love the over sized desserts found at most American restaurants, you'll likely be disappointed, however I found the portions to be perfectly satisfying.

Canyon Ranch is definitely not all about the food--- it just happens to be one of the highlights of staying there. After a full day of yoga, biking, hiking, and perhaps a facial, you'll be more than ready for a wonderful, healthy, satisfying meal...that someone else prepares for you. Now that is a great day!

This is my version of a salad I enjoyed at Canyon Ranch. I added lean, white meat chicken for protein, and a balsamic vinaigrette for a little tangy kick. By omitting the dried fruits I found in the Ranch's salad, and adding fresh strawberries, I lowered the calorie count too (dried fruits are high in sugar and calories).


Simple Strawberry & Spinach Salad with Chicken

Serves 4

4 cups baby spinach leaves, washed and dried
2 breasts of skinless, boneless chicken, cooked and diced
8 fresh strawberries, sliced
2 oz goat cheese
1/4 cup olive oil
1/4 cup balsamic vinaigrette
Salt and pepper

Divide the spinach onto four plates. Top with diced chicken and sliced strawberries.
Break apart the goat cheese and divide amongst the four salads.
Place balsamic vinegar in a measuring cup and while whisking, add olive oil in a slow drizzle to form a vinaigrette. Season with salt and pepper to taste.
Pass dressing in a small gravy boat or creamer, so guests can use as much or as little as they like.

Check out my website at http://www.thesecretingredientonline.com/

Monday, September 3, 2007

Christmas in August

Christmas Cookies in HDR

While most people spend August at the beach, on vacation, or simply enjoying the balmy weather, this year I found myself all wrapped up in Christmas cookies. In my line of work as a cooking instructor and food writer, I often find myself looking several seasons forward, as I develop classes and magazine articles. This August, despite the heat and desire to eat light, I was up to my apron strings in cookie dough.

As I contemplated a December "Holiday Baking" class, as well as a magazine article on Christmas cookies and holiday cookie traditions, I found it a bit difficult to wrap my mind around the idea of baking in 90 degree weather. So before I pulled out my stand mixer and turned on the oven, I headed to the library for some inspiration.
The librarians definitely looked a little bewildered as I checked out stacks of holiday baking books. "Getting an early start, are you?" one asked. "My, you're certainly thinking ahead!" commented another. With a smile and a swipe of my library card, I was well on my way to a near-certain sugar-induced food coma.

I read about the history of cookies, and specifically how they became associated with Christmas. I learned about various ethnic holiday traditions, and which of those traditions were brought to America with the many waves of immigration. I spoke with five local women who do a tremendous amount of baking around the holidays, after convincing them to fast-forward their brains four months because I had a September 1st deadline. Then it was finally time to head to the kitchen and bake.
I tried two recipes for chocolate cookies----my standby chocolate mint cookies (an old Bon Appetit recipe), and a new recipe which called for the cookies to be dipped in confectioners sugar before baking, which created a beautiful result. In the end I decided to combine the two for a chocolate mint cookie that looks like a brown and white peppermint swirl candy.

I then moved on to bright and colorful holiday wreaths, loaded with green food coloring and red cinnamon hot candies for decoration. I made two types; one with a marshmallow base and one with a white chocolate base. My extended family was certainly a bit perplexed when I showed up to our vacation rental house with Tupperware containers full of little Christmas wreath cookies, but no one complained about having to test the results, particularly my two little girls!

I moved through biscotti, bar cookies, and finally gingerbread cookies, made from a recipe submitted to me by a local baker. Since I will be publishing the latter, I was careful to note any changes I had to make to the recipe, to be sure it was easily replicable by a reader. I rolled the gingerbread into cut-out cookies, used the dough for drop cookies, baked with and without parchment, and with and without insulated baking sheets. I then froze a portion of the dough to test its longevity in the freezer. The last test was to see how long the cookies stayed fresh tasting in an airtight container. It was finally time to clean up the kitchen, draw up a final description for my December class, and draft my magazine article.

It is now Labor Day, and I feel as if Christmas has come and gone---only without all the stress of buying gifts, decorating the house, and cooking large, extravagant holiday meals. As a result of my August holiday cookie extravaganza, I've added a few new recipes to my holiday dessert table, designed a unique cookie class for my students, and completed a fun article featuring some local women who log in about as much time in the kitchen as I do. Who said summertime isn't for baking? Merry Christmas!

To check out my class schedule, including the "Holiday Cookies" class, go to http://www.thesecretingredientonline.com/

Be sure to look for my article "Let Them Eat COOKIES!" in the December/January issue of Fairfield Magazine.

Monday, August 27, 2007

Restaurants: Skappo Wine Bar, New Haven, CT


Skappo, located at 59 Crowne Street in New Haven, CT, is a treasure trove of Italian delicacies, wine, culture, and camaraderie. It is truly a family affair, owned and run entirely by the Sincavage family. However, don't mistake Skappo for a run-of-the-mill family-owned Italian restaurant. It is truly a find.
Upon entry, you are led into the cozy, dark wood panelled room, which is reminiscent of an authentic Italian trattoria (designed by father, Thomas Sincavage). The restaurant is small, but holds two long tables which have community seating (meaning your group may be seated next to another party---all the more fun), and has a few other smaller tables for two, if you are looking for a romantic evening out. Daughter Yvette, who serves as hostess, waitress, and most importantly, baker and pastry chef, explains the menu and makes wine suggestions. Per her suggestion, our group started with a delicious red wine from the Umbria region of Italy. Yvette's older brother, Michael, also manages the front of the house, as well as being responsible for choosing wines for the all-Italian list.
Mother Anna, and youngest son, Marc, run the kitchen, which turns out a wide variety of "small plates", similar to tapas, which are meant to be shared. There are many selections within each of the following categories: salumni e formaggi (cured meats and cheeses), crostini, vegetali (vegetarian dishes), to carne e pesce (meat and fish dishes), and of course, dolcetti (sweets). We began round one with five dishes including a fresh mozzarella, black truffle and mushroom crostini on walnut bread (unusually delicious!), and moist spinach meatballs in a sweet raisin sauce (again, unusually delicious!). After the first bottle of wine was finished and the plates were all but wiped clean with Yvette's homemade bread, we were ready for round two.

We unanimously agreed that second servings of the crostini and meatballs were in order. We also tried a dish featuring wild boar (an Italian specialty, similar to pork but slightly more gamey), and over-sized, pillowy ricotta & sun dried tomato gnocchi topped with arugula pesto. Everything on the menu was as exciting to eat, yet somehow simple and authentic, like all real Italian food.

Mid-meal, Anna emerged from the kitchen and lit up the dining room with her cheerful presence. She doled out two-cheeked "Italian" kisses to everyone in the restaurant, whether she knew them or it was their first visit (as it was mine). We talked about the food, Italy, and how she decided to name her children. She and her family make everyone feel at home at Skappo. The food is amazingly delicious, but wonderfully un-fussy. It is true, down-to-earth Italian food, but unlike anything you've ever tasted.

By the end of the meal, everyone in our group was pleasantly full, but we all agreed to make room for dessert. The chocolate "salami"---a concoction of bittersweet chocolate, raisins and nuts, rolled into a log resembling a salami --- was rich and sweet, and a perfect ending to a satisfying meal. Together with our cappuccini (a common American mistake we didn't mind making---true Italians would never drink cappuccino after dinner!), our meal was wonderfully complete. Skappo is definitely worth a visit----or several! I know I'll be heading back very soon!
For more info about hours, special events, and/or Skappo's menu, go to http://www.skappo.com/

Monday, August 20, 2007

Pizza on the Grill


In summertime, I cook just about everything on the grill. I love to grill burgers, ribs, chicken, fish, and veggies, but perhaps my favorite grilled food is pizza. There are no special gadgets required to turn out delicious, crisp pizza. All you need is a hot grill, all the ingredients for your favorite pizza, and a watchful eye.

Before you get started, preheat your gas grill to high for about 10 minutes (or 450 degrees). While you're waiting for the grill to heat up, prepare your pizza ingredients. The members of my family are purists when it comes to pizza, so Pizza Margherita is our pie of choice (red sauce and mozzarella cheese). To make things simple, I use store-bought pizza dough, and my favorite prepared tomato sauce (which for me, is Victoria brand). However, I do not cut corners on the cheese, opting to grate my own mozzarella rather than buying the pre-shredded variety. Most shredded cheeses have additives to prevent clumping, and I prefer to eat my cheeses without de-clumpers, thank you very much! It is also a good idea to use regular mozzarella cheese rather than fresh mozzarella, which tends to have a high water content. The regular mozzarella melts much better, and will not release a lot of liquid on top of your pizza.
To stretch the pizza dough, I coat my hands in olive oil rather than flour. I find the oil helps the dough stretch more easily, in addition to adding flavor. Be liberal with the oil, as it will keep your pizza from sticking to the cooking grates as well. Once stretched, place the dough on your hot grill grates and immediately turn the heat down to medium. Close the grill cover, and allow it to cook for about 5 minutes.
While I don't recommend opening the grill cover frequently, you will need to check to be sure the bottom of the pizza is not burning. This can happen very quickly, so definitely do not walk away for too long. Although my husband actually likes the burned crust, my kids and I prefer it a little on the lighter side. Once the pizza's bottom is golden brown, flip it over, and add your toppings to the cooked side (which is now facing up). Cook an additional 5-7 minutes until the bottom is browned, and the toppings are bubbly. Carefully remove the pizza to a platter, cut and serve.

Grilling pizza gives it incredible flavor, a fantastic crispy crust, and avoids a mess in the kitchen! So, the next time you're tempted to order out for pizza, consider "grilling out "instead!
Grilled Pizza
Serves 4
1 lb prepared pizza dough (available in the refrigerator section of most grocery stores)
1 cup prepared tomato sauce
2 cups shredded mozzarella cheese
3 T grated Parmesan cheese
1/4 cup fresh basil leaves (optional)
Follow directions above.

For more information about The Secret Ingredient, go to http://www.thesecretingredientonline.com/

Tuesday, August 7, 2007

Iced Coffee---A New Cold Brew

Blue Bottle, Kyoto Style Ice Coffee
As I sat waiting for my two young daughters to finish their PB&J bagel sandwiches in Brugger's Bagels, my eyes wandered the art work and promotional posters covering the walls. One in particular struck me; "Cold-Brewed Coffee!" What did they mean? Was that the opposite of brewed iced tea? Wasn't there a beer that claimed it was "cold-brewed"? While my girls polished off their lunches, I pondered the concept of "cold-brewed" coffee. Until recently, I never drank iced coffee. It seemed watery and lacking in flavor. Iced lattes were another story---they were robust and refreshing. But was "cold-brewed" coffee more satisfying than regular iced coffee?

The very next day, the lead article in the New York Times Dining In/Out section featured cold-brewed iced coffee ("Iced Coffee? No sweat!" by Cindy Price, June 27, 2007). According to the author, cold-brewed coffee was fuller and sweeter than its hot-brewed sister. She claimed that by not introducing hot water, the coffee does not become bitter and retains a more pleasant flavor. Cold-brewed coffee could be easily made at home, she continued, with a simple mason jar, coarse ground coffee, cold water, and a coffee-filter lined sieve. By mixing the coffee grounds with cold water in the mason jar and allowing it to sit on the counter overnight, by morning one simply needs to strain the mixture through the lined sieve, and voila! Mix with ice, add milk and/sugar, and a cold-brewed delight awaits you!


I tried her technique and it produced an excellent result. The coffee was so sweet, it barely needed sweetener. However, rather than fussing with the sieve and coffee filter, why not just use a French coffee press (pictured left)? Simply add the coffee and cold water to the press (1 heaping tablespoon per 4 ounces water), and let it sit overnight, to allow the coffee to infuse into the water (when hot, it takes only a few minutes to do so). The next morning, press, pour, and enjoy a perfect cup of iced coffee! You'll get the same great cold-brewed coffee with a minimum of effort.


For more information on The Secret Ingredient Cooking Classes, go to http://www.thesecretingredientonline.com/

Tuesday, July 31, 2007

Learning from Experience

There is something to be gained from every experience. Therefore, anytime I learn about a cookbook author, chef, or restaurant owner giving a lecture or doing a book-signing, I book a babysitter and clear my calendar. I'm also a sucker for "Chefography" on the Food Network, but that is neither here nor there.

While listening to Mark Bittman speak at my local Border's bookstore, I learned that not only was he not a culinary school graduate, but that when he first started food writing he did it for free. I also learned that he thinks the best way to learn your way around a professional kitchen is to work in a restaurant (again, without pay, if necessary). From local, underpaid writer/restaurant kitchen apprentice, to New York Times columnist and bestselling cookbook author. Impressive, and duly noted.


Next I attended a lecture given by Carole Peck, chef/owner of the critically acclaimed Good News Cafe in Woodbury, Connecticut. She regaled us with stories about being a member of the first class to admit women at the Culinary Institute of America, and of working her way through restaurant kitchens all over the country, having to prove herself as a "real" chef, despite not possessing a Y chromosome. I learned that cooking in a restaurant can be incredibly competitive, and sounds incredibly exhausting. I also learned that as long as you absolutely love what you are doing, and believe in it fully, with some patience, a little luck, and a lot of hard work, you can be successful. Ms. Peck was also the first person to suggest to me that I start a food blog. At that point, I wasn't really sure what a blog was, but I promised myself I'd look into it.

Most recently, I returned to Border's to hear Sheila Lukins discuss her new edition of The Silver Palate Cookbook. I learned that she began her career in food much in the same way I did. As an educator-turned-stay-at-home mom of two, she greatly enjoyed cooking and often entertained for friends. There was no formal culinary training, simply a love of food and cooking. While our paths diverge at this point---Ms. Lukins began a catering business where as I began a cooking school---I certainly hope my road leads me to the places she's been over her 25+ year career. I learned that writing a cookbook takes years of hard work. I learned that her signature dish, Chicken Marbella is pronounced "Chicken Mar-BAY-a" as in Marbella, Spain, not "Mar-BELLA" like it is spelled. I also learned that she is the second successful person in the food world who believes I should start a food blog. Again, duly noted.

So, as I wrap up this most recent blog entry, I give thanks to those who suggested I try "blogging", I reaffirm that I've chosen the best career path for me, and I accept that there is plenty of hard work ahead. Now, back to watching my TiVoed episodes of Chefography.

For more information on cooking classes, go to http://www.thesecretingredientonline.com/